
Skip to content


Tips and tricks for building Sanity schema efficiently

Tips and tricks for building Sanity schema efficiently

Want to build a page or craft detailed articles? Our Sanity schema tips and tricks offer the perfect starting point. A guide to upping your CMS game.


We're big believers in standardisation, it's all around you, you've seen:

  • Design systems
  • Design tokens
  • Componentised design
  • React patterns

So we thought to ourselves: "Why should Structured Content be any different?". That's why we've written a fully opinionated guide for building your regular style of website.

Now you might be asking: "*surely the whole point of Structured Content is to give the developer the freedom to build whatever they like". *This is true, but the reason we've written this guide is to make the whole process of learning about Sanity CMS more uniform, and easier to understand.

This guide won't fit everybody, but it should hopefully give you an understanding of how to better structure content. If you're just looking for a Sanity V3 primer, there's a great layman's breakdown here

The anatomy of a good document

We've broken down a good document to help with understanding the why's and how of writing a piece of Sanity schema.

typescript
export default {
  // Get used to camelCase for naming things
  name: "exampleDocument",
  title: "Example document",
  type: "document",
  //   The fields array is where you define the fields
  //   of your document type
  fields: [
    //  The reason we always use Title is because
    //  Sanity defaults to this field when creating previews
    {
      name: "title",
      title: "Title",
      type: "string",
    },
    {
      name: "description",
      title: "Description",
      //  A nice thing to do is to create a rough row limit dependent
      //  on the description. E.g 3 rows for a short description.
      //  You can also add validation but we're not covering that here
      rows: 3,
      type: "text",
    },
    {
      name: "image",
      title: "Image",
      type: "image",
      //  You can also add hotspots to images.
      //  Be aware it's a little trickier if you're using Next Image
      hotspot: true,
      fields: [
        // This is to ensure the alt text is filled out
        {
          name: "alt",
          type: "string",
          title: "Alt Text",
        },
      ],
    },
    // We will explain the basics of portable text in the next section
    {
      name: "portableText",
      title: "Portable text",
      type: "portableText",
    },
  ],
  //   This is how we setup the preview for the document type
  //   When it's a document we almost always use the description
  //   field as the subtitle
  //   However, we advise a little different on a page builder
  preview: {
    select: {
      title: "title",
      subtitle: "description",
      media: "image",
    },
    prepare({ title, subtitle, media }) {
      return {
        title: `${title}`,
        subtitle: `${subtitle}`,
        media,
      };
    },
  },
};
Services
$ Sanity CMS development
Schema architecture, reusable patterns, and Sanity studio customization for content teams.
>Learn more

Previews

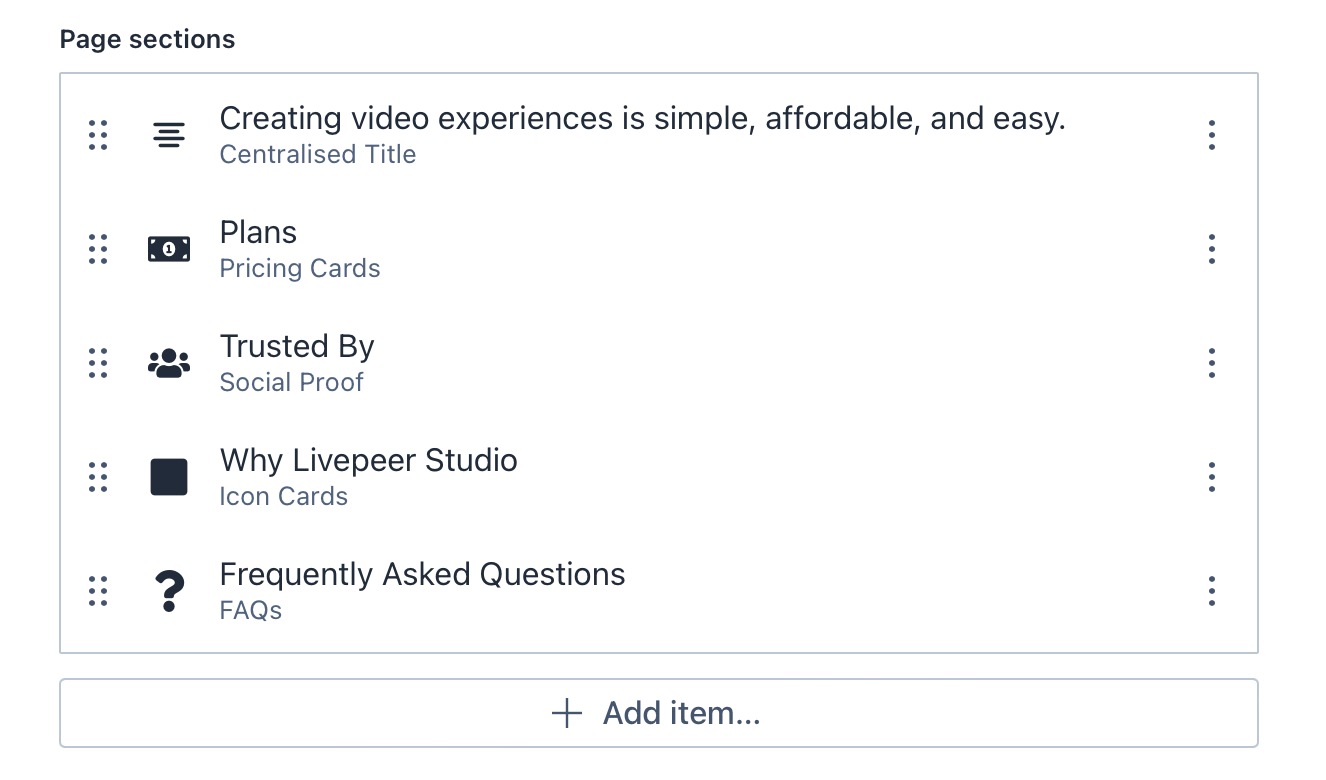
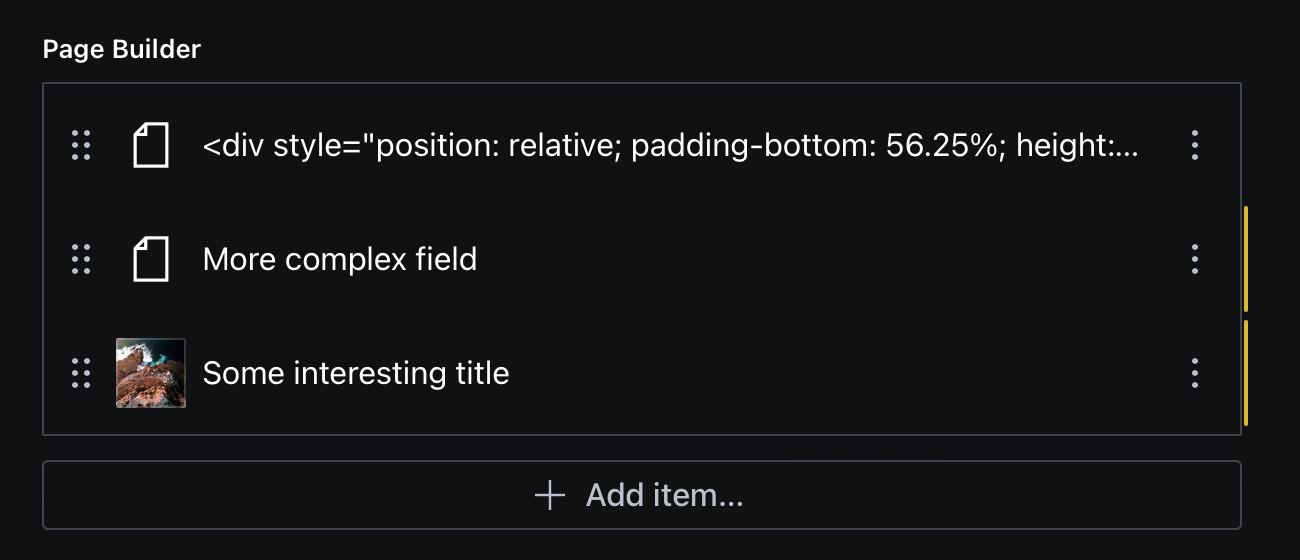
The most important element of the above content is a preview, that's where your client can actually see the content being populated from the Document pane.

See how much better the data looks on a properly prepared page builder, in comparison to one without any preparation:

Unprepared preview
Unprepared preview

Prepared preview

A prepared preview

The difference is night and day (not just because of light and dark mode), and your future clients will appreciate the effort.

No spam, only good stuff

Subscribe, for more hot takes

Only god knows why anybody would purposefully subscribe themselves to a newsletter that moans about development. These poor souls did though
Profile 1
Profile 2
Profile 3
Profile 4
Profile 5

Adding an icon

Something you might have noticed on the prepared preview above, is the little icons to the left of the title and description. Can you see how much clearer it makes it - providing a client with not just a descriptive text of what it is, but also an image to represent.

typescript
import {FaNewspaper} from 'react-icons/fa'

export const SingleArticle = {
  title: 'Article',
  name: 'article',
  type: 'document',
  // This icon makes all the difference
  icon: FaNewspaper,
  fields: [
  ...
  ]

Page builders

The faster you get used to adding these little icons and nice little previews, the quicker it becomes to scale your structured content. As a nice little bonus, all these icons get pulled through in arrays and other structures to make it even easier to build a page builder and actually know what you're adding to a page.


Frequently asked questions

What does a good Sanity document schema look like?
A camelCase name, a title, type 'document', a fields array and a preview. Our example document has a title string, a description text field with a row limit, an image with hotspot and alt text, and a Portable Text field, with a preview that uses the description as the subtitle.
Why should every Sanity document have a title field?
Sanity defaults to the title field when it builds previews, so keeping a Title field on every document type means previews work without extra setup. It is the first field in our example schema for that reason.
How do I set up a preview for a Sanity document type?
Add a preview block with select pointing at the title, description and image fields, and a prepare function that returns title, subtitle and media. For plain documents the description makes a good subtitle; page builders need a slightly different approach.
How do I add an icon to a Sanity schema?
Import an icon (we use FaNewspaper from react-icons) and set it as the icon property on the document definition. The icon then shows next to the title and description in previews, and is pulled through into arrays and page builder blocks.
Why do schema previews matter for clients?
The preview is where a client actually sees the content populated from the document pane. We compare an unprepared preview with a prepared one and call the difference night and day, so the small amount of setup pays off every time someone opens the studio.
How do I make sure editors add alt text to images in Sanity?
Nest an alt string field inside the image field so it sits alongside the upload. We also enable hotspot on images, with a warning that hotspots are a little trickier to handle if you are rendering with Next Image.
Why standardise Sanity schema at all?
We argue that structured content should follow the same logic as design systems, design tokens and React patterns. An opinionated, uniform approach makes Sanity easier to learn and makes the studio faster to scale, even if our guide will not fit every project.

About the author

Jono Alford

Founder of Roboto Studio, specializing in headless CMS implementations with Sanity and Next.js. A Sanity Pioneer and first-cohort Sanity Community Ambassador, focused on editorial experiences that help teams ship faster.


Related posts


Related videos


Get in touch

Tell us what you're building. We reply within one working day. Jono or someone on the team picks up every message personally.

By sending this you agree to our privacy policy. We only use your details to reply.